


Made for the midilib custom SFX instrument project
And in action:


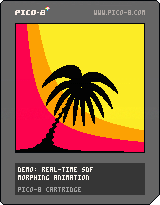
The animation is taken from one of my other projects. The palm tree image is adapted from the tutorial The basics of Painting with Maths by Inigo Quilez.
 3 comments
I mean, who doesn't compose for helicopter, right?
Made for the midilib custom SFX instrument project
Credit's always nice but not required.
Here it is in action. Please forgive the poorly and hastily drawn helicopter.

So this isn't strictly Pico-8 related but I just came across a video series on Youtube which I thought others here might enjoy.
The Animation of Final Fantasy
The intention seems to be to follow the evolution of FF animation all the way from FF-I up to FF-whatever-number-they're-up-to-by-the-time-he-finishes-the-series.
So far he's only up to FF-IV (the first Super Famicon/SNES release) but I think the first three (the Famicon/NES releases) are probably most interesting to Pico-8 developers. I thought it was an interesting look into how the developers managed with so few assets and—especially in FF-II—how they were able to use those assets to tell a story and convey at least some very basic sense of character.
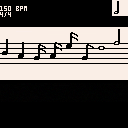
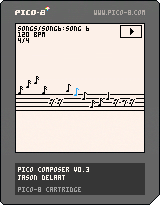
PICO Composer v0.3
Changes
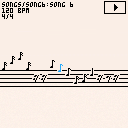
PICO Composer main menu
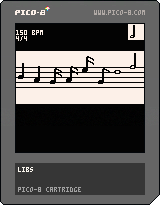
When you start the cart you'll be prompted to load an album or create a new one. Use the up/down arrow keys to navigate the menu and enter to select. Either, or both, of the tempo and time signature can be left blank and you'll be given the defaults of 120 bpm and a 4/4 time signature. Any time signature that can't be parsed properly will default to 4/4.
When creating a new album the album name will be the name of the file—no need to specify .p8 extension—where your work will be saved. At the moment each "album" can only have a single song, with a single voice, on instrument 0. The idea though is to have each album contain multiple songs. Space constraints may end up making that infeasible but that's the plan for now at least.
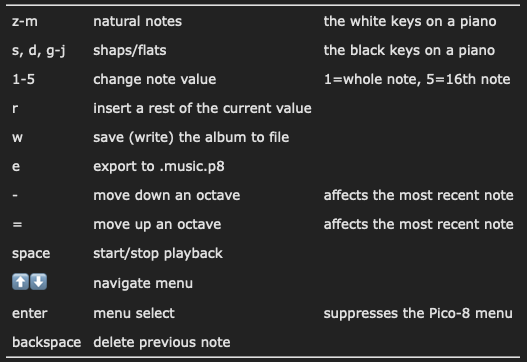
Controls:
PICO Composer is intended to be run locally with a full keyboard and will save your work to a separate .p8 file.
Demo Song/Album
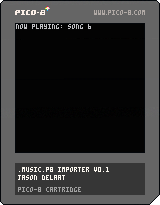
Download this cart and save it in the same directory as picomposer.p8.png Load and run picomposer and when prompted select load album, type song6 and press enter. It should load and after a couple of seconds you'll see the last few notes of the song. Press space to play the song from the beginning.
When you export an album (press e) a new file album_name.music.p8 will be created. This file can't be edited in Pico Composer and is intended to be imported for use into your own carts. To do so copy/paste the code from the example below and use the load_music() and play() functions.
(Note: The song data for this cart is in the spritesheet and it's "importing" from itself into upper memory. Usually you'll be importing from the generated .music.p8 file but I wanted a self contained example.)
The importer is currently pretty heavy sitting somewhere around 600 tokens. Once I've got a few more features implemented I'll revist and try to bring the size down.
Future Development/Feature Wishlist
- Select/edit note(s)
- Allow all the pico-8 instruments and custom instruments
- Multiple songs per album
- Dynamics: volume pp, p, mp, mf, f, ff, fff
- Allow up to 4 voices and ability to switch around between them
- Clefs. As is the staff is in treble clef. Adding, at least, bass clef would be useful
- Bar lines
- crescendo, decrecendo
- Repeat symbols and voltas
- Effects/articulations (tremolo, etc.)
- Maybe a mode specifically for notating drum parts
- Possibly the ability to convert to/from the pico-8 tracker format
- Joining notes when possible (connected 8th notes, for instance)
- Ties and slurs
- key signatures
- Draw leger lines
- Start screen with nicer menus
- Reduce importer code size.
Proof of concept version:
I may have a non-standard definition of fun...
Disclaimer: I'm fully aware that this is quite likely a completely useless little utility as far as PICO-8 development is concerned. I just like writing this kind of thing just for fun. But if you do find it interesting or useful, let me know!
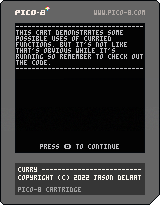
This is basically just a function which allows you to create curried functions—which I attempt to explain below if you're unfamiliar with them—which can be partially applied in a natural way in Lua. I'm not sure why it took me so long to write this since it's just a rip-off of my python implementation of the same thing.
Anyway, here it is on github or you can copy/paste the code from the example.
Example
Here's a simple little proto-game thing which I stuffed full of as many curried functions as I thought I could reasonably get away with. Not gonna claim that it's the best—or even good—way to organize a game but I think it does an okay job of showing how to use partial application as a sort of dependency injection/data encapsulation.
What is function currying?
If you've never encountered curried functions before they can seem a bit weird at first but they're actually pretty simple.
Function currying — which gets its name from mathematician Haskell Curry for whom the Haskell programming language is also named — is a transformation which turns a function which accepts multiple arguments into a series of functions which each accept only a single argument. For instance, if we have this function which accepts three arguments:
    function sum3(x, y, z)
       return x + y + z
end |
Then when we curry it, we end up with a function which takes the first argument and returns a new function. This new function accepts the second argument and returns a third function which accepts the third argument and finally returns the result. We could write that manually like so:
    function sum3_curried(x)
       return function(y)
          return function(z)
              return x + y + z
          end
       end
end |
The curry function basically does this for you so instead of having to write a bunch of nested functions manually you could just do this:
sum3_curried = curry(3, sum3) |
Or this without having to define sum3 first:
    sum3_curried = curry(
       3, function(x, y, z)
          return x + y + z
       end
) |
Which makes it easier to see what the function is doing without having to wade through multiple levels of nested functions.
And I would want to do that because…?
Curried functions can be useful in a bunch of situations but they all basically come down to one thing: partial application.
With the sum3 function you have to pass all the arguments at once or else you'll get an error. With sum3_curried you can pass one, two, or all three and you'll always get something back. In the case of one or two arguments, you'll get back a function which you can stash in a variable and use later. In other words, you can pass curried functions some of their arguments now and the rest of their arguments at some later time.
But isn't sum3_curried(1)(2) kind of ugly and annoying to write?
It sure is!
The curry function doesn't actually construct a bunch of nested functions. Instead, the function returned by curry takes a variable number of arguments and keeps track of how many it's got so far. Once it has the right number of arguments, it calls the actual function and returns the result.
These are all valid ways of calling the versions of sum3_curried created with curry:
    sum3_curried(1, 2, 3)
    sum3_curried(1)(2, 3)
    sum3_curried(1, 2)(3)
sum3_curried(1)(2)(3) |
Just creating a thread to collect music that I write. Mostly just for myself—to have things I like all in one place which I'll update periodically as I write new stuff—but feedback is always welcome should anyone feel so inclined. I'm mostly not making any efforts to use space efficiently. I probably should. Meh, one day. Also, I'm terrible at naming things so if anybody feels like suggesting titles or some kind of coherent naming scheme, I'm all ears.
With that in mind here's my first entry. A jaunty little tune I threw together this morning.
2022-04-16:
Song 1: Jaunty Tune in Eb Major
[sfx]
This one was from a few weeks back. Don't remember when exactly. I was going for something sort of mysterious-ish but still with some upbeat parts. Maybe a bit more repetitive than I'd like but I think turned out alright overall. C Minor, I think.
Song 2:
[sfx]
2022-04-17:
A Less Jaunty Tune in Eb Minor
This has the exact same structure as the first song but minor instead of major and with some chromatic notes thrown in to give it a bit of dissonance. I like it less but it's okay.
Song 3:
[sfx]
2022-05-09
Song 4:
[sfx]
This is another one I wrote a while ago but didn't get around to PICO-8-ifying it until today. This could be made to loop forever after pattern 07 but the way I wrote it here it repeats twice and has an actual ending.
Song 5:
[sfx]
Another older one because apparently today is my day to copy stuff over into the tracker.
Song 6:
[sfx]
2022-06-22
Song 7: Playing around with 4 part SATB writing.
[sfx]
I've not had much time lately but thought I'd throw up a WIP that I've been playing with for a few days as a bit of a distraction from...everything. It's one of the longer pieces I've done so far at just a bit under three minutes and probably one of the first that feels like a whole piece rather than just a section or an experiment.
There's a couple rather clunky key changes which stick out like sore thumbs. Still figuring those out. Sometimes they work for me and sometimes they don't and I haven't quite figured out how to turn one that's not working into one that does. But I'm getting there. So far I'm only using 3 of the four channels so I'll probably add some percussion-y and/or other decorations in on that fourth channel at some point. Which might actually help with the key changes? Maybe? Don't know.
I really just started making music of any kind back in late October/early November. I'm pretty musically clueless so it came as something of a surprise when making music turned out to be a thing I really enjoyed in and of itself. I posted a thread (Tell me about how you compose music) to discuss making music in general and got a bunch of great replies. Thanks in particular to @packbat who gave me loads of great advice and resources. Whether I've used them effectively or not is another matter. I'd always be happy to hear from more people about their music making process if anybody feels like hopping over there and adding anything.
I'm brand new to making music and I'm interested in hearing about how different people approach composing for their games. Not in terms of using the music editor—I'm fine with that—but more about your process/workflow for creating the music itself. You can assume that I understand about scales/modes, keys, chords, chord progressions, etc. and feel free to sling around jargon/technical terms if you want I can always go look up anything I don't understand.
I realize that everybody goes about things their own way; I'm not looking for a "right" way to make music, more just interested in peeking into people's brains while I try to figure out my own way of doing it.
The kinds of things I'm interested in (not an exhaustive list!):
- How do you start? With the main melody? With a beat? Chords? Something else? Do you always start the same way or does it depend? On what?
- Do you create your music from scratch directly in the PICO-8 music editor or do you use something else, like a DAW and then "translate" the music over into PICO-8?
- Do you have particular modes, chords, or whatever that you use regularly to get that characteristic video game-y feel? Any that you avoid?
- Any other tips/tricks you think might be useful.
I'm interested in hearing from anybody who feels like sharing whether you have a formal music background, are self-taught or just throw a bunch of random notes together until something sounds good.
I myself have zero formal music background and was mostly never really "got" music. Don't get me wrong, I like music well enough but it's always just kind of been a thing in the background. I might know all the words to a song but not what the song is called or who performs it. Fairly recently I started playing around with LMMS and found that, in fact, making music tickles my dopamine receptors and is pretty addictive. So I've been deep diving and learning all I can.
I can do individual things, like write a melody or a chord progression, etc. but the big picture where it all comes together eludes me. Ultimately the solution to that is to learn more and make/practice (much) more but, in the meantime, let me know how you do it!
I didn't know much about compression algorithms when I started looking into this stuff and, in truth, I still know very little. So this may all be old-hat to a lot of people but hopefully somebody finds it interesting.
What am I compressing and why do I want to compress it?
For the last month or so I've been playing around with Signed Distance Fields (SDFs) first by making some simple pictures with them and using them to handle collsiion detection and then using them as the basis of a procedural morphing animation.
I'm interested in SDFs for a few reasons: I'm not much of an artist but I do like math. If I can substitute math for art in certain situations, that potentially works to my benefit. Also, since SDFs can be used to handle collision detection and they can be updated on the fly with boolean-like operators—union, intersection and difference—they seem like they could be a good choice for modeling level geomoetry and, in particular, destructible level geometry. But mostly I just like playing with them.
In general, you create a function which returns the minimum distance from any point on screen to the surface of whatever object you're modeling and then use that distance to determine pixel colour, or detect collisions, or whatever. But calling functions, especially complex functions as SDFs tend to be, is really slow, especially if you're doing it for every single pixel on screen. To get the animations to actually animate at a reasonable speed I had to pre-calculate all the distances and store them in an array so distance checks became table look-ups. Much faster.
Creating those functions and generating those arrays required a fairly large number of tokens though. So I've been learning about compression algorithms to store those arrays directly and use a, hopefully, smaller number of tokens to decompress them.
To compress, or not to compress
Like most things, it's a trade-off: for a multi-cart system you can probably fit a decent amount of SDF data per cart; for single carts, it's almost certainly not worth it.
SDF data is big. Not as big as I had originally thought but still pretty big. Even though I was ultimately able to get quite good compression ratios we're still talking about thousands of characters worth of binary data per screen of data stored. With a fixed limit of 65535 characters, that adds up fast. In fact, as I'll discuss later, it actually adds up even faster than you'd think. Each compressed SDF only requires three tokens but saving all the tokens in the world doesn't do you any good if you don't have any characters left to use them.
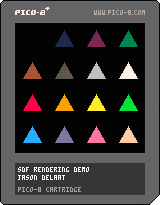
Test data
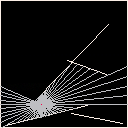
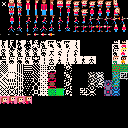
I mostly used the SDFs from the animation linked above as my compression test data. Here's, sort of, what they look like as distance fields.
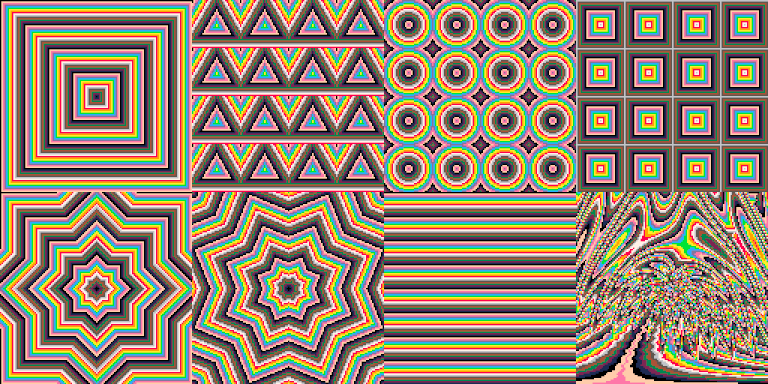
Left-to-right, top-to-bottom: Square, Repeated triangles, Repeated circles, Repeated squares, Star, Rotated Star, Line, and Palm tree.
It's worth noting, again, that I'm storing the actual distance data itself and not these images speciifically. The images just give a sense for how the distance fields change and how simple or complex they are. An advantage of working with distance fields in that you can use the same data in multiple ways. Here's a quick little cart which demonstates the idea:
Press 'x' to cycle through the different options. It's the same data in all cases, just being rendered differently.
How big is an SDF anyway?
At first I thought I might have to store fractional values so I'd need 32 bits per pixel. But no. In reality, at least how I'm using them so far, I'm working with integer distances on a single screen. The farthest away something can possibly be on a 128x128 display is about 180 or so along the diagonal: 8 bits is plenty.
Eight bits is definitely an improvement over 32 but still, that's one byte of data per pixel or 16384 bytes per screen of SDF data. At that size, a direct encoding of four SDFs would bust the PICO-8 character limit. The animation linked above uses eight SDFs.
So that number, 16384 bytes, is the base/uncompressed size for all my test data.
Compression algorithms
I tried a variety of algorithms both individually and in combination. These are the main ones.
Run length encoding (RLE)
RLE compresses by replacing a run of identical distances with a single instance of that distance and a number representing how many times it occurs before changing.
It was my assumption that RLE would be a bad choice for SDFs because, although some have long runs of repeated distances, most distances change with every pixel. If your run length is always one then instead of storing one integer per pixel, you're storing two.
Even so, I figured I'd test my assumptions by actually trying it and, sure enough, RLE on its own makes distance data larger, not smaller.
Huffman Coding
A Huffman coding encodes each unique distance with a different binary representation. Not all distances are represented with the same number of bits and the encoding is built in such a way that values which occur often use fewer bits than values which occur more rarely.
On its own, Huffman coding gave similar levels of compression as the LZW algorithm below.
Lempel-Ziv-Welch (LZW) compression
LZW is sort of, but not really, similar to RLE. It doesn't look for runs of identical distances but instead looks for sequences which it has seen before. When it finds one it inserts a reference to that sequence, essentially saying, "take that thing over there and put it over here as well."
Vector Distance Transform (VDT)
Once I thought to search for distance field specific compression algorithms, I found this paper describing VDT and it's the basis for the approach I decided to take so I'll describe it in a little more detail.
Rather than assigning a distance to each pixel, VDT assigns a vector to each pixel. The vector indicates which other (previously calculated) pixels, if any, can be used to calculate the distance for the current pixel. If we calculate pixels left-to-right and top-to-bottom then there are four possible vectors: the pixels directly above the current pixel, the pixels directly to the left of the current pixel, the pixels diagonally up and to the left of the current pixel, and the null vector indicating that the current distance can't be calculated based on previous pixels.
Since there are four possible vectors, each vector can be represented by two bits and the entire array of vectors takes up a total of 4096 bytes. Each null vector indicates a distance that we can't calculate and have to store directly, adding an additional 8 bits each, while every non-null vector is a distance that can be entirely eliminated from our data for a net savings of 6 bits each.
VDT on its own can reduce the size of an SDF fairly dramatically. But a nice feature of VDT is that, once the distance prediction step is taken, the vector data and remaining distance data can be further compressed using other methods. For instance, although RLE doesn't do so well with raw SDF data, it does a great job on the resulting vector data.
I tried two approaches and they gave very comparable results. Both start by doing the vector distance transformation.
The first approach then applied the RLE algorithm to the vector data and a Huffman coding to the distance data, finally combining the result into a single binary string.
The second approach starts by combining the vector and distance data into a single binary string and then running the LZW algorithm on that string to compress it further.
Below is a summary of the results I got via various methods. The VDT+LZW columns could just as well be VDT+RLE+Huffman since the results were very similar.
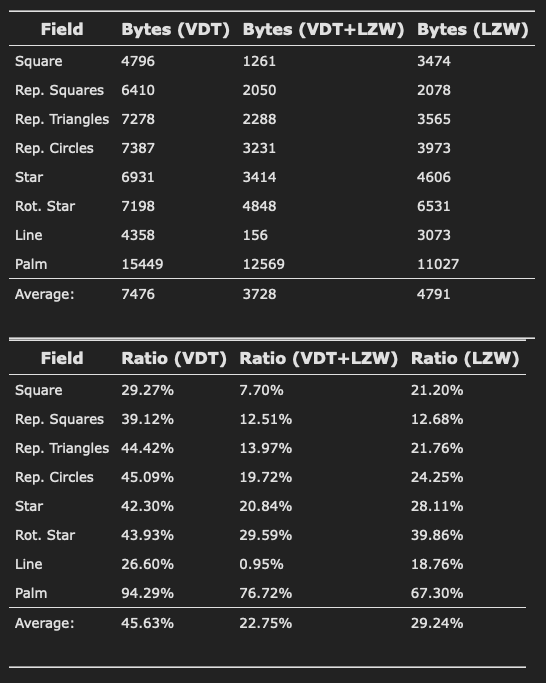
Lossless vs Lossy
I suspect that the palm tree SDF compresses so poorly because it contains a bunch of non-linear transformations: sines, cosines, exponentials, etc. which means the distance field isn't "well behaved" and, therefore, difficult to predict.
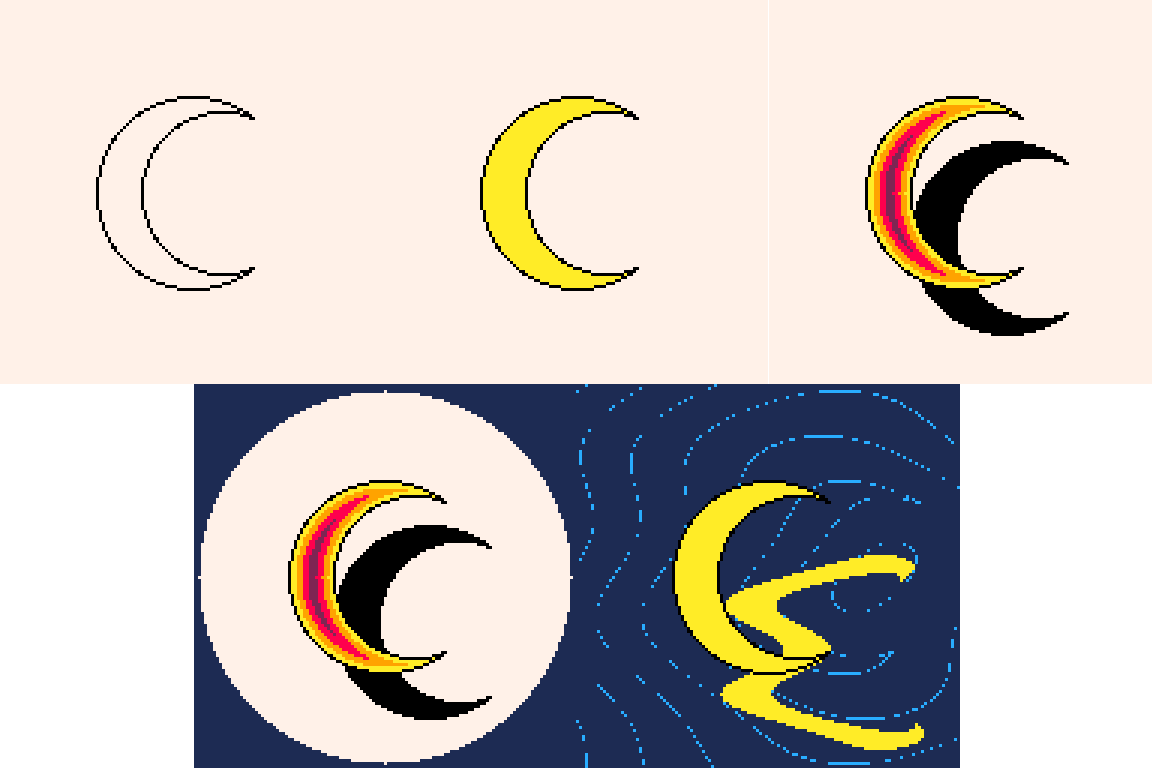
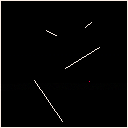
The VDT algorithm is lossless by default—it only removes a distance which can be predicted exactly—but is easily modified to be lossy. I wanted to see if I could get the palm tree SDF down to a more reasonable size without degrading the quality too badly. Spoiler alert: not really. It's easier to see when rendered as an image:

The first image is the lossless version as listed in the table above. The distortions in the second could be acceptable in some situations but still only gives a 74% compression ratio with a maximum squared error of 5. The last image, which looks like Thanos had a personal vendetta against trees, has a max squared error of 10 and still only compresses down to about 60% or a little under 10000 characters!
Compressing less to compress more
One particularly interesting discovery I made was that—even though the VDT+LZW combination gives the best compression on average—the best way to fit more SDFs per cart was to use VDT only. Why should that be the case? VDT by itself gives the worst compression of those listed. How is that better?
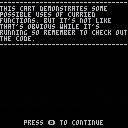
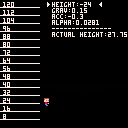
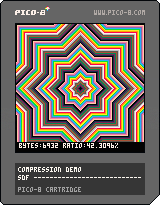
I figured this one out by accident when I copied the binary strings, except for the palm tree, into a cart, ran INFO and saw this:
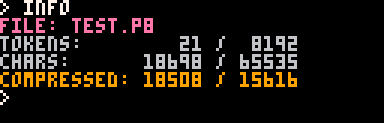
The raw character count and the compressed character count are nearly the same. Which actually makes sense: I've compressed the data significantly so whatever algorithm PICO-8 is using to compress code isn't able to squeeze much more out of it. That particular screen shot is when using VDT+LZW but the same thing happens when using LZW only, Huffman coding only, and VDT+RLE+Huffman coding.
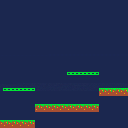
That got me thinking: PICO-8's compression is probably better than mine. So what if I only used VDT and let PICO-8 compress it the rest of the way for me? Here are the same seven SDFs with only VDT encoding.
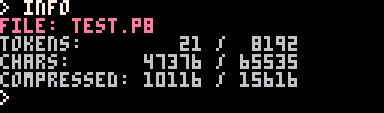
It uses up a lot more of the raw character count but the compressed character count is much lower and there's still room to spare!
Edit: I forgot to actually post the compression/decompression code anywhere so here's a cart demonstrating it. The code is also on github

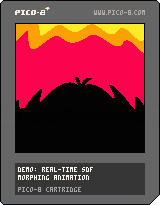
The final image is an adaptation of the image from the Principles of painting with math tutorial by Inigo Quilez.
I'm using fixed time-steps and the animation is intentionally a bit slow so "real time" might be fudging the truth a bit but I thought I wouldn't be able to animate these things at all and it turns out I was wrong. I just needed to trade off time for space in time honoured fashion. That's why there's a "loading screen" at the start: most of the time intensive calculations are being done up front. I used the SDF utility I posted the other day—not strictly necessary of course, you can just write the functions directly—to create all the signed distance functions used for the animations and then converted them to arrays by pre-calculating all the distances and turning distance checks into a simple table lookup.
This animation uses 8 such tables and takes up about 661kB (including all the code, other variables, etc.) so fits fairly comfortably in the 2MB of available lua memory.
This is mostly a proof of concept thing so the code isn't super well documented or elegant and I'm kind of just manually stringing together all the individual animations. Improvements could certainly be made but overall I'm pretty happy with how it came out.
Ideally I'd like to be able to generate the SDFs and convert them to tables from a separate cart (or another language/external tool/whatever) and export the data so it could be used in other carts. I don't know much about image/data compression algorithms so if anyone can point me towards one that might be suitable it would be greatly appreciated.
- The data is a 1D array of distances—which can be fractional—so each array stores a full 32-bits per pixel for every pixel on the PICO8 display. It's not image data as such so there's no requirement for it to be viewable as an image, though that might be neat.
- I'm not too worried about how long it takes to compress the data but fast decompression with a low-ish token count would be great.
- By the same token, I don't necessarily need optimal compression. Good enough is...good enough.
I thought about run length encoding but I don't think distance fields are good candidates for that in general since many rows change value every pixel.
Anyway, I hope you enjoy it. Comments, criticism, suggestions all welcome!
PICO-8 has been my obsession for the last few months but math is my always obsession and lately I've been having a lot of fun playing around with various aspects of geometry so when I hit a weird bug in my other project I decided to take a break and shift gears a bit. So I threw together a little interface for working with 2D signed distance fields/functions.
It's fairly hefty at a little over 500 tokens so probably not super useful generally speaking but pretty fun to play with, if I do say so myself.
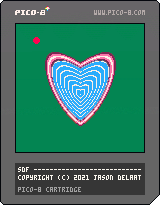
Here are a couple series of images I've created so far. In each, all of the images are made from the same SDF and just messing with how colours are assigned based on the distance.
That last one is my attempt at a ripply/watery reflection which, I think, didn't come out too badly.
And some hearts.

If you're not familiar with them, SDFs are frequently used with a ray marching technique to render 3D scenes as a faster alternative to ray tracing. (See Inigo Quilez's work for some stunning examples of this in action. Or basically anything on shadertoy.) Anyway, ray marching is basically just a collision detection algorithm so, apart from making pretty pictures, an SDF can also double as actual level geometry.
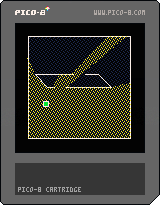
In the cart below I took the same SDF that was used to generate the image and used it to turn the pool/fountain thing into a collide-able part of the scenery. (In fairness, I'm not actually using ray marching here I'm really just checking for when the distance goes from positive to negative. But you could do better/smarter things if you really wanted to.)

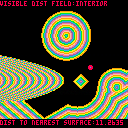
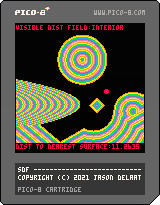
In this one I just threw together a bunch of random geometry. Move around with the arrow keys and press Z to cycle which distance field(s) are visible: none, interior, exterior, or both.
Building on my previous ray casting toy I've been playing around with shadow casting.
Old (30fps):
New (60fps):
Most examples of this I've come across work with tiles/on a grid. This works with arbitrary line segments with the following caveat: the more line segments, the worse the performance. This example runs okay at 30fps but not so much at 60fps.
Most of my time seems to be lost in the actual casting of rays.
Things I plan to do but haven't done yet:
- Currently I'm casting two rays, slightly offset, towards every line segment's end-points (after removing duplicates so I'm not casting at the same point more than once.) I figure it shouldn't be too terribly difficult to modify it so a ray which hits a line's end-point is extended to the next wall instead of stopping. Then I'd only need one ray per end-point cutting my total number of rays in half.
- Culling the geometry before casting so instead of casting at everything, I only cast at everything within a visible radius. Bonus, that'll also make it easy to only cast in the direction the character is facing instead of casting in all directions.
I do sort things a few times and I'm using bubble sort because it was easy to implement but I'm sorting pretty short lists so I don't think it's a huge time sink.
Suggestions on how to optimize further are very welcome!
Edit:
Optimized a couple things:
- Made casting rays more efficient by in-lining the wall/ray intersection calculations.
- Made removing duplicates more efficient by using a set-like data structure.
- There are enough line segments/end-points that a more efficient search makes sense so threw together a (probably pretty bad) merge sort.
The new version has approximately the same CPU usage at 60fps that the old version had at 30fps. I'm sure some optimization wizards out there can help me squeeze some more out of this.
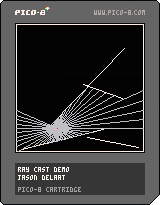
Had a video on ray casting pass by in my Youtube feed the other day and thought I'd play around with it a bit.
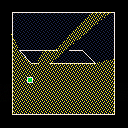
There are the four outer walls and then four randomly generated interior walls. It's casting 27 rays so, when moving, that's 216 intersections calculated per frame at 60 fps. Either more walls or more rays forces it down to 30 fps so it's a bit of a performance hog (okay, a huge performance hog.) I'm sure it could be optimized somewhat, though I'm unlikely to do it.
Edit: Okay, so apparently I lied. I realized that I could have my rays do double duty by calculating two intersection points each, one in each direction along the line. So I get effectively twice as many rays for virtually no extra cost.
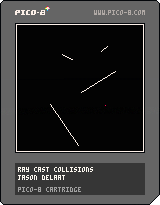
Here's a quick little modification I made which uses the same logic to handle actual collisions with the walls. It's only casting one ray in the direction of movement so you could add a lot more walls before you notice performance issues. It's not perfect. Every once in a while the red dot will zip right through a wall. I suspect this is just because of decimal precision errors and in an actual game could be fixed by checking more than one point for collisions: the four corners of the sprite for instance. But, again, I probably won't bother.
Oh, and the video:
State Machines
A wrote (a couple variations of) a simple state machine manager. The code is on github under an MIT license. There are a couple demos down at the bottom of the page.
- state-machines-du (107 Tokens): each state has its own draw and
update methods - state-machines-st (111 Tokens): each state has setup and teardown
methods which are run only when the state is entered and exited
respectively
Usage
Creating a state machine
To create a new state machine use the 'new' method:
sm = state_machine:new() |
Adding states
After creating the machine itself you need to add states. A state
consists of four things:
- A unique name or identifier: Most likely a string but can be
anything as long as it's unique. - A transition function: This function is called once per cycle
and should return the identifier of the state the machine
should switch to. - An update (or setup) function: The update function is called
once per cycle and should update variables, etc. associated
with the state. For state-machine-st.lua, this is instead a
setup function which is only run once each time the machine
enters this state. - A draw (or teardown) function: The draw function is called
once per cycle and should draw everything relevant to the
state. For state-machine-st.lua, this is instead a teardown
function which is only run once each time the machine exits
this state.
Add a state to the machine using the 'add_state' method:
    sm:add_state(
       -- identifier
       'a state',

       -- transition function
       function()
          if btnp(5) then
         return 'some other state'
          else
         return 'a state'
          end
       end,

       -- update function
       function()
          if timer then
         timer += 1
          else
         timer = 0
          end
       end,

       -- draw function
       function()
          print(timer)
       end
) |
Using the state machine
-
state-machine-du.lua
Once you've created a state machine and added some states using it
is simple: Set the initial state then call the update and draw
methods.
        function _init()
           sm:set_state('a state')
        end

        function _update()
           sm:update()
        end

        function _draw()
           cls()
           sm:draw()
end |
The update method calls the current state's transition function
and changes the current state if necessary and then calls the
current state's update function. The draw method calls the current
state's draw function.
-
state-machine-st.lua
The setup/teardown version is basically the same except there is
no draw method and the update method does a bit more work, so all
you need is this:
        function _init()
           sm:set_state('state 1')
        end

        function _update()
           sm:update()
           -- whatever other update stuff you need to do.
        end

        function _draw()
           cls()
           -- whatever draw stuff you need to do.
end |
The update method in this version also calls the transition
function. If a state change is necessary, then the current state's
teardown function is called, then the current state is changed,
and finally the new state's setup function is called.
Demos
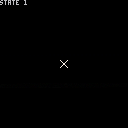
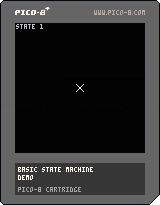
basic-sm
A very basic state machine with two states. Press X/V to switch from state 1 to state 2, Z/C to switch from state 2 to state 1.
platform-tut
A simple platformer demo with 5 states: intro, tut_movement, tut_jump, play, and gameover.

I've finally started working on an actual game. The programming is not a problem but art, on the other hand, well...there be dragons.
I'm not an artist and it doesn't come naturally to me but pixel art, 8x8 pixel art in particular, seems much more approachable than more traditional types of art. I think because the feedback cycle is shorter and more obvious: with only 64 pixels to play with, it's pretty obvious when you put one in the wrong spot and there are a limited number of choices available for how to fix the problem. So I spent a few days poking around the sprite editor doing a bit of an "art study" to see what I could figure out. Comments, tips, tricks, etc. very much welcome.
This is very much not a tutorial. I'm not and artist and I'm not qualified to teach anybody anything about doing art of any kind. If people find it interesting or useful, great! But mostly I'm just using this as a place to record observations for future me to think about when I'm trying to figure out what the heck my game should actually look like. I'll add the full sprite sheet at the bottom if anyone's interested in having a look at it.
Basic proportions
One of the things I remember from my many failed attempts to learn how to draw is that people are generally about 8 heads tall, which seems ideal for an 8x8 box. One for the head (duh), three for the torso, and four for the legs, with the hand hanging just below the waist. Sketching that out as a sort of measuring stick, I got this:
|
|
[8x8] |
Trying to make that into a front view though presented immediate problems:
|
|
[8x8] |
The shoulders are a bit too broad compared to the head but the main problem is the pogo-stick leg. So obviously I had to mess with the proportions a bit to get something that looked acceptable.
|
|
[8x8] |
|
|
[8x8] |
The legs had to be shortened to allow for the larger head but at least now I get hair! This is, I think, probably about as close to "proper" human proportions as it's possible to get inside and 8x8 box.
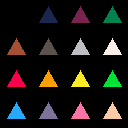
Messing with proportions
Alright, so how does it change if I mess with the proportions further? Maybe other people will read these differently than I do but here's what I've got:
-
Extending the torso an additional pixel gives him a solid, football player-ish kind of feeling.

[8x8] -
Making the legs one pixel longer, on the other hand, gives a more prim and proper, possibly slightly
stuck-up vibe.

[8x8] -
Lowering only the shoulders gives him a "stylish" turtle neck.

[8x8] -
While making the head larger makes the character feel a bit more heavy-set. Especially if the torso is
also extended an extra pixel making the legs shorter.

[8x8] 
[8x8] -
I did a couple characters at 8x16 with the same basic proportions where each pixel in the 8x8 becomes a
group of 4 pixels in the 8x16 which can then be edited to keep the proportions more in-line. Didn't do
many of these though

[16x16] -
And then, of course, with a bit of understanding of the proportions and how to balance them, I went for
the big-head, small-body look. I tried a few variations:

[8x8]

[8x8] But eventually ended up with this cute little guy. With a whole pixel of headroom to spare!

[8x8]
Animation
Okay, so I'm getting the hang of things but now I need them to move. I went back to my original "measuring stick" guy and tried a walk cycle.

Not too bad. The torso stays straight up and down so I also tried angling it forward and backward to see how that changed the feel of the walk.


The forward tilted one feels like it moves faster, even though it doesn't, and feels like it has more of a sense of purpose about where it's going. The backward tilted one feels slower and like it's ambling, lazily, almost clumsily from place to place. Honestly, I feel like I could do almost anything with the legs and as long as I've got that bit of a head bob and the arm swinging, it'll pretty much read like a walk.
Tried the little cute guy next and even added an idle animation and played with the position of his head.

Feet don't do much. Still looks like a walk. Nice.
And finally, having just watched a video on sub-pixel animation I thought I'd give that a try in a small way by making a couple guys with weapons.


1-bit
I decided to try making 1-bit black-and-white characters because I'd have to figure out how to suggest shape and separation of body parts with as few pixels as possible since I couldn't use colour to distinguish the sections. Mostly just rehashed everything I did above but in black-and-white only but a few things I learned: The colour stick-guy walking looked okay in all three versions. In 1-bit, the forward tilt of the body was essential to suggesting the direction of motion. Everything else just looked vaguely off no matter how I tweaked the frames.

For characters with faces, outlining the head but leaving it open on one side worked best and, depending on the size of the head, eyes can go right up into the hairline or not. Also, I found for some reason that a black pixel behind the hand really helped to sell the idea of the hand hanging by the waist even though that black pixel didn't really represent a part of the character's body. More like just a shadow which helped to sell the idea of a hand there.
|
|
[8x8] |

And then, once I've got a general character I'm happy with I can always colourize the sprite if I want to.

|
[16x16] |
Textures
How do you make something look hard or soft? Rough or smooth? I have literally no idea. I started by just trying to sprinkle some random pixels around and try to figure out if it looked rough or smooth. What it looked like was a bunch of random pixels.
So instead, I created a few regular patterns, copied them and then made some tweaks trying to change the texture somehow. What I mostly ended up with were just a bunch of different patterns. I guess some looked rough and some looked smooth but mostly they just looked either more or less regular.
|
[32x32] |
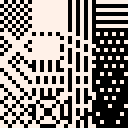
As individual tiles they don't look like too much but some of them made nice patterns when tiled together. And I played around and found a few others that I liked as well:

|
[24x24] |

|
[24x24] |

|
[24x24] |

|
[24x24] |

|
[24x24] |
Didn't really get me closer to texture though. So here's the process that I figured out, basically applying a manual noise filter, that's giving me fairly decent results. I think, anyway.
I take copy of the "clean" tile and overlay some other pattern with a different colour. Usually diagonal lines but sometimes other patterns too, it takes some trial and error to find a good one. Anyway, once I've done that, I apply some rule like, "all grey pixels in the top half of the tile get coloured white while all the grey pixels in the bottom half get coloured black." That gives me a "dirty" tile which still has some recognizable structure to it but is a bit messed up.
|
|
[8x16] |
Tiled together on their own the dirty tiles are a bit too messy but mixing a few clean tiles in with them gives the eye enough to pick out the underlying pattern and make sense of the whole thing.

|
[24x24] |
And then, just like with the characters, I can colourize them later. Here are a couple I quite like. Though I make no claims that my colour choices are any good or that these are great or anything. But, I think, not a terrible starting point, at least.

|
[24x24] |

|
[24x24] |

|
[24x24] |
So that's the beginning of my pixel art journey so far. Still much to learn but I'm starting to get a handle on it.
I hate fiddling with meaningless magic numbers trying to get a behaviour right. I prefer a bunch of knobs with predictable effects. So I made this little tool for fine tuning variable-height jumping behaviour for platformers.
Note: As written, it's possible for the cart to get stuck in an infinite loop for certain values so read below on how to, hopefully, avoid that issue.
Usage:
- Up/Down to select a value
- Left/Right to modify the value
- X to test the jump, tap for small jumps, hold for higher jumps
There are three tunable values and a fourth value which is calculated for you and can't be changed manually. Once you get something you're happy with, note down the values, and use or modify the jumping code from this cart in your own project. I think I've clearly indicated all the parts of the code that can be deleted and which parts should be modified. If you do use it, attribution is appreciated but not necessary.
The tunables are pretty self-explanatory. They are:
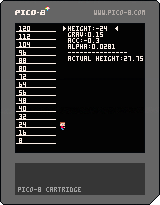
- height
- gravity
- initial acceleration
The fourth value, alpha, is calculated based on the other three.
Height:
This should be a negative number (upwards direction) in pixels. It's actually more like "requested height." Depending on the other values there is a certain amount of error in the calculations so the maximum height of the jump won't be exactly the height you specify but it should be close.
Gravity:
This should be a positive number (downwards direction). Technically, the units are pixels per frame per frame but that doesn't really matter. As you'd expect, this controls how fast you fall. Higher values make you fall faster; smaller values, slower.
Initial acceleration:
This should be a negative number (upwards direction). This is the upwards acceleration of the character when you press the jump button. While you're holding the jump button, this acceleration slowly decreases until the character is once again only under the influence of gravity. If you let go of the jump button before the jump reaches its full height, the acceleration is cut immediately and the character starts to fall sooner.
Alpha:
Alpha is calculated from the other three values and controls how quickly the initial acceleration decays.
Issues:
Given the specifics of the physics, it turns out that alpha can't be determined analytically: There's no nice simple formula for it. Or maybe there is and I'm just not patient enough to grind through the equations to figure it out...Anyway, it can be solved computationally, essentially using a binary search algorithm. Which is fine except that PICO-8's limited floating point precision as well as the way lua handles division by zero (turns out 0/0 = 32768, take that math!) means that the algorithm sometimes gets stuck in an infinite loop because it can't find a good enough solution.
Avoiding problems:
Height error
Gravity and initial acceleration should have similar magnitudes, just in opposite directions. The greater the difference between them, the more error creeps into the requested height. Basically, if the difference is too great then once the upward acceleration cuts out, it takes longer for gravity to slow the character down and it over-shoots the target height. The closer the two are in magnitude, the closer to the target height you'll get. However...
Infinite loops
Though it is by no means obvious, when gravity and initial acceleration have the same magnitude the code which calculates alpha will try to divide by zero and the program won't be able to find a suitable solution. But it'll keep trying. Forever.
PICO-8's limited floating point precision means that this actually become a problem when gravity and initial acceleration are even close to being the same magnitude. If gravity = 0.3 and acc=-0.3, that's going to cause problems.
In general, gravity and acceleration should be close to the same size (but in opposite directions) if you want accuracy in height but not too close or the cart will freeze up.
This is only a problem when calculating alpha based on the other values. When you copy/paste the code you'll just assign alpha and can tweak the other values to be as close as you want.
I've been playing around with various procedural generation techniques and wrote a little tool for creating generative string grammars. It's 104 tokens and the code is on github under an MIT license.
Demos
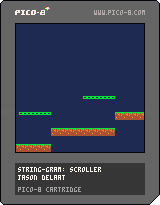
This first one generates side-scroller/platformer levels. Each character of the generated string represent a four tile wide column of the map. I didn't add a player because I just wanted to showcase the level generation itself so the map just scrolls automatically from the start to the end. Reload the cart to generate a new level. It's just an example so the levels aren't particularly interesting but you could add a few "post-production" passes over the generated strings to clean things up, generate enemies, add additional rules for pre-made features, etc.
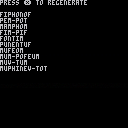
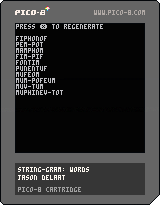
The next one is a vastly simplified version of this process to generate names of things/places in a made-up language. The grammar constructs some syllables then makes words of either two or three syllables. A final pass over the generated word cleans up some messy, hard-to-pronounce double consonants. For a quick, not very sophisticated implementation it comes up with almost but not quite decent sounding place names.
API
string-gram provides a number of functions to help you build a grammar and it's easily extensible via custom rule functions. Grammar rules are just functions which take no arguments and return a string.
-
lit
The lit function takes a string as input and produces a rule which will generate that string when called:
h = lit('hello') -- h is a rule, aka a function of 0 arguments.
print(h()) -- prints 'hello' |
-
seq
The seq function takes any number of rules as input and produces a new rule which outputs the result of each rule in sequence.
h = lit('hello')
c = lit(', ')
w = lit('world')
hw = seq(h, c, w)
print(hw()) -- prints 'hello, world' |
-
choice
The choice function takes any number of rules as input and outputs a new rule which outputs the result of one of those rules chosen at random.
a = lit('a')
b = lit('b')
ab = choice(a, b)
print(ab()) -- prints either 'a' or 'b' at random |
-
copy
The copy function takes a single rule and an integer, n as input and outputs a new rule which applies the given rule n times.
a = lit('a')
aaa = copy(a, 3)
print(aaa()) -- prints 'aaa' |
-
sym and register
Grammars are often defined recursively so you may find yourself needing to include one rule, which you haven't yet defined, inside the definition of some other rule. sym and register solve this problem by allowing you to insert a 'symbolic' rule which will be looked up at a later time when it's actually called.
one = lit('1')

-- This won't work!
-- many_ones = choice(one, seq(one, many_ones))

-- Instead, we use a symbolic rule...
many_ones = choice(one, seq(one, sym('1s')))

-- ...and then use register to insert the rule into a lookup table.
register('1s', many_ones)

print(many_ones()) -- prints random number of 1s
-- ex: 1, 111, 1111111111111, etc |
-
Custom rules
Rules are just functions which take no arguments and return a string so you can easily create your own rules or functions which create rules. For instance, suppose you want to create a rule that randomly returns the output from another rule or else returns an empty string. One way to do that would be like so:
function zero_or_one(rule)
   return function()
      if rnd() > 0.5 then
     return rule()
      else
     return ''
      end
   end
end

a = lit('a')
a_or_not = zero_or_one(a)
print(a_or_not()) -- prints either one 'a' or nothing with 50/50 probability |
This is the second of the two little utilities I've made, the first being stream-ecs (in a separate post.)
The github project page.
prot-oo
This one's a bit more straight-forward. Prototype based inheritance/OOP. It basically just defines the base object and a few methods.
Use create to use an object as a prototype for some other object:
dog = object:create() -- use the base object as prototype dog.sound = 'woof!' function dog:talk() print(self.sound) end cat = dog:create() -- use the dog object as prototype cat.sound = 'meow' dog:talk() -- woof! cat:talk() -- meow |
You can create classes (well, not really, because prototypes, but sort of) by defining a method called init and using the new method.
vec2D = object:create() function vec2D:init(x, y) self.x = x self.y = y end function vec2D:length() return sqrt(self.x^2 + self.y^2) end v = vec2D:new(3, 4) v:length() -- 5 |
The new method creates a new object with vec2D as the prototype and then passes its arguments to init which initializes the object.
And sub-classes:
vec3D = vec2D:create() function vec3D:init(x, y, z) self.proto.init(self, x, y) -- calls vec2D's init self.z = z end function vec3D:length() -- overrides vec2D's length return sqrt(self.x^2 + self.y^2 + self.z^2) end v3 = vec3D:new(1, 2, 3) v3:length() -- 3.74-ish |
And that's about it. Enjoy!
I picked up a copy of PICO-8 a few months ago on a whim and have been playing around with it, following a tutorial here and there, etc. Really enjoying it and I love seeing the creativity of people in the community.
I have yet to try my hand at an actually complete game and, as I'm basically infinitely distractable, may never actually accomplish it. In the meantime, to learn some of the ins and outs of Lua, with which I was not previously familiar, I've combined two of my favourite software writing pastimes: re-inventing wheels and making tiny utilities.
In that spirit, I give you:
- stream-ecs (267 tokens), a (sort of) reactive stream based entity-component-system with automatic entity queue management, and
- prot-oo (72 tokens), prototype based object-oriented programming (in a separate post)
I'll describe them a bit below and there's more info at the github project page. Each tool has its own README describing it in detail.
stream-ecs
I know there are a few different ECS frameworks floating around the PICO-verse. This one's larger than some and smaller than others but should, I hope, save you tokens in the long run by managing queues of game entities for you.
You start by creating a "world" and then spawning systems off of it:
world = ecs()
world
   :system({'timer'}, increment_timer)

world
:system({'timer', 'position'}, move_character) |
Each system creates and manages its own queue and when you add entities to the world...
world:insert(character) |
... the world passes it to each system which either stores it in its queue, if it matches the selectors, or discards it.
You can also chain systems together to create a sort of filter. This example is functionally identical to the one above:
world = ecs()
world
   :system({'timer'}, increment_timer)
:system({'position'}, move_character) |
Entities with a timer component go into the first system's queue then, of those entities with a timer, those which also have a position component go into the second system's queue.
You define components like so:
position = component('position', {'x', 'y'}) |
Which returns a constructor function:
p = position(1, 2) p.x -- 1 p.y -- 2 |
And you create entities like so:
character = entity() :add(position(1, 2)) :add(timer(0)) |
There's a pre-defined draw component and draw system so you don't have to manage those manually either, you can just do this:
function _draw() cls() world:draw() end |
And updating all your entities is this easy:
function _update() world:run() end |
Here are a couple demos:
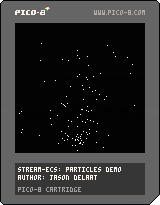
Simple particle system
Spawns a new particle at the source each tick. Particles are removed from the system after 200 ticks so there are 200 particles on screen at any given time.
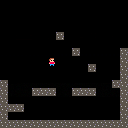
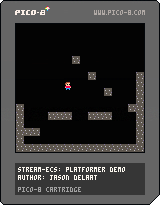
Simple platformer
Collisions are a bit wonky: the character occasionally falls into the floor some reason but that is, presumably, because of how I wrote collisions and not the ECS itself. It should be enough to give you an idea of how it works, anyway.